


 Workflows
Actions


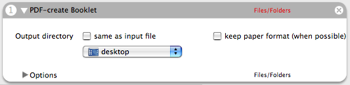
Create PDF Booklet
**Function:** Reorders the pages of a PDF so that you can print it as a booklet.
**Author**: [Christoph Vogelbusch](http://web.mac.com/vogelbusch/iWeb/Site/Programs/Programs.html)
**Requires**: PDFs in portrait format.
**Input**: (Files/Folders) Needs PDF-files as input.
**Options**: You can optionally try to preserve paper format. This means the portrait page is turned to landscape and two pages are fitted onto the landscaped one. For pages that are already landscape this option is ignored.
**Output**: (Files/Folders) PDF with ladscape pages, two orignal pages per resulting page, ordered binding in the middle.
**Notes**: Print the resulting PDF with Layout setting:"Two-Sided: short-edged binding" or print the odd pages and turn them manually to print the even pages. Installer includes a PDF Service for printing PDFs directly with this action.
Worked like a charm! You’re a lifesaver! (Well, at the very least, a time saver!)
Thanks!
Comment by E Schrad — February 1, 2007 @ 2:16 pm
Thanks, but this didn’t work for me. :-( (yet?) I’m no tech wiz, but I got the script installed, opened the PDF I wanted to booklet-ize, clicked Print, then under PDF, clicked “Create Booklet.” It then gives me an error warning saying, “Sorry, but you can’t save from the print menu. Instead, click File>Save” Any idea what I could do?
Comment by J Newton — November 1, 2007 @ 8:46 pm
For those who is seeking a similar tool but don’t own a Mac: here is a free online tool for creating PDF booklets.
Comment by Slava — February 21, 2008 @ 7:32 pm
I had the same experience as J Newton. Does anyone have an answer?
Comment by Judith Repke — March 4, 2008 @ 12:06 pm
This also worked beautifully for me! If you’re having trouble maybe you’re not doing it right. Try this:
1- Open Automator
2 – Drag the PDF document you want to Bookletize to the workflow window
3 – On the Library pane, click on PDF to view the available actions.
4 – Drag the ‘PDF – Create booklet’ action to the Workflow window AFTER the File action created when you dropped the PDF file (Get Specified Finder Items)
5 – Click the ‘Run’ button.
6 – Look for the new PDF file in the directory specified as Output. It will be named as ‘Booklet’ followed by the name of the original PDF.
Comment by L Lopez — March 12, 2008 @ 4:07 pm
Hey, for those of you having the issue J Newton had, and for J Newton too.. here is what you problem is…
Do not open this in Acrobat for Mac. Open your PDF in Preview and go from there. This will solve all issues.
Comment by Chris — November 6, 2008 @ 6:25 pm
Nice work.
Very long document are best broken into sets of sub-booklets, each with a multiple of 4 pages. Otherwise the stack of papers gets too thick to staple or bind.
With your current script, it’s possible to do this manually by printing multiples of 4 pages at a time. How about adding this functionality to the automator script?
Comment by ak — November 17, 2008 @ 12:17 am
great!
solution to my problem transitioning from OpenOffice on PC (where brochure print works within OO) to Mac (where it doesn’t).
good to have such a generic solution
many thanks! micha
Comment by Micha — January 27, 2009 @ 7:25 am
Hi, when I run the pdf booklet, it turns my pdf’s into landscape. Ie, combines two pages into one in landscape format. However, I want to make my print in vertical, and also not double paged.
Comment by SMR — May 10, 2009 @ 8:52 pm
Please disregard my last comment, I’ve just re-read the info provided. I’m tired and didn’t realize the pages were coming in landscape so you can bind in the middle.
Comment by SMR — May 10, 2009 @ 8:54 pm
I have a PDF booklet file that I need to “reverse” meaning that I need to turn the PDF booklet back into individual pages – is there anything that will do that ?
Comment by Paul — November 10, 2009 @ 11:55 pm
When I try to use CreateBooklet, my computer sys it needs a ‘universal’ version (?).
Comment by Betsy Copley — March 29, 2010 @ 8:41 am
I got the setup file as in “.dmg” Format after extacted the downloaded file. It can’t open in windows Xp.So it failed to run.
Comment by Midhun Vijay — April 17, 2010 @ 3:42 am
does not seem to work in osx 10.6.3….bummer..
Comment by alexg — May 16, 2010 @ 6:26 am